How to Back Up Your Website on Squarespace
One of the great things about Squarespace is that it’s a very comprehensive platform that includes all the features a typical website might need right built into the platform. The fact that there are no external plugins installed on the website makes the platform very secure and difficult to hack, and it also reduces compatibility issues between features and the risk of “breaking” your site.
In fact, if you ever run into any issues with your website, you can contact Squarespace’s technical support, and they can help you restore your site. I know this from personal experience: once, I was experimenting with some additional code on my website, and the site became corrupted and lost almost all of its content, but after I contacted Squarespace support, they were able to restore everything to normal within a couple of hours.
However, even though Squarespace is a very secure and reliable platform, it’s a good idea to back up your site’s content just in case something unexpected happens.
The thing is, Squarespace doesn't have any tools specifically designed to create a full site backup, so we have to look for alternatives to do it ourselves. And while these alternatives may not be the ideal solution, they do allow us to back up at least the most important information on our site so we can restore it if necessary.
Duplicate your site
One of the features Squarespace introduced this year was site duplication. With this tool, we can create a copy of our site that we can use if needed.
One thing to keep in mind is that the duplication option doesn’t copy absolutely all of the content on your site, but it does duplicate most of it and can serve as a good backup. For more information on which elements are duplicated and which aren’t, check out this Squarespace article.
To duplicate your site, follow these steps:
1. Go to your Squarespace account page. It should look like this, but of course, it will show the sites you've created in your account:
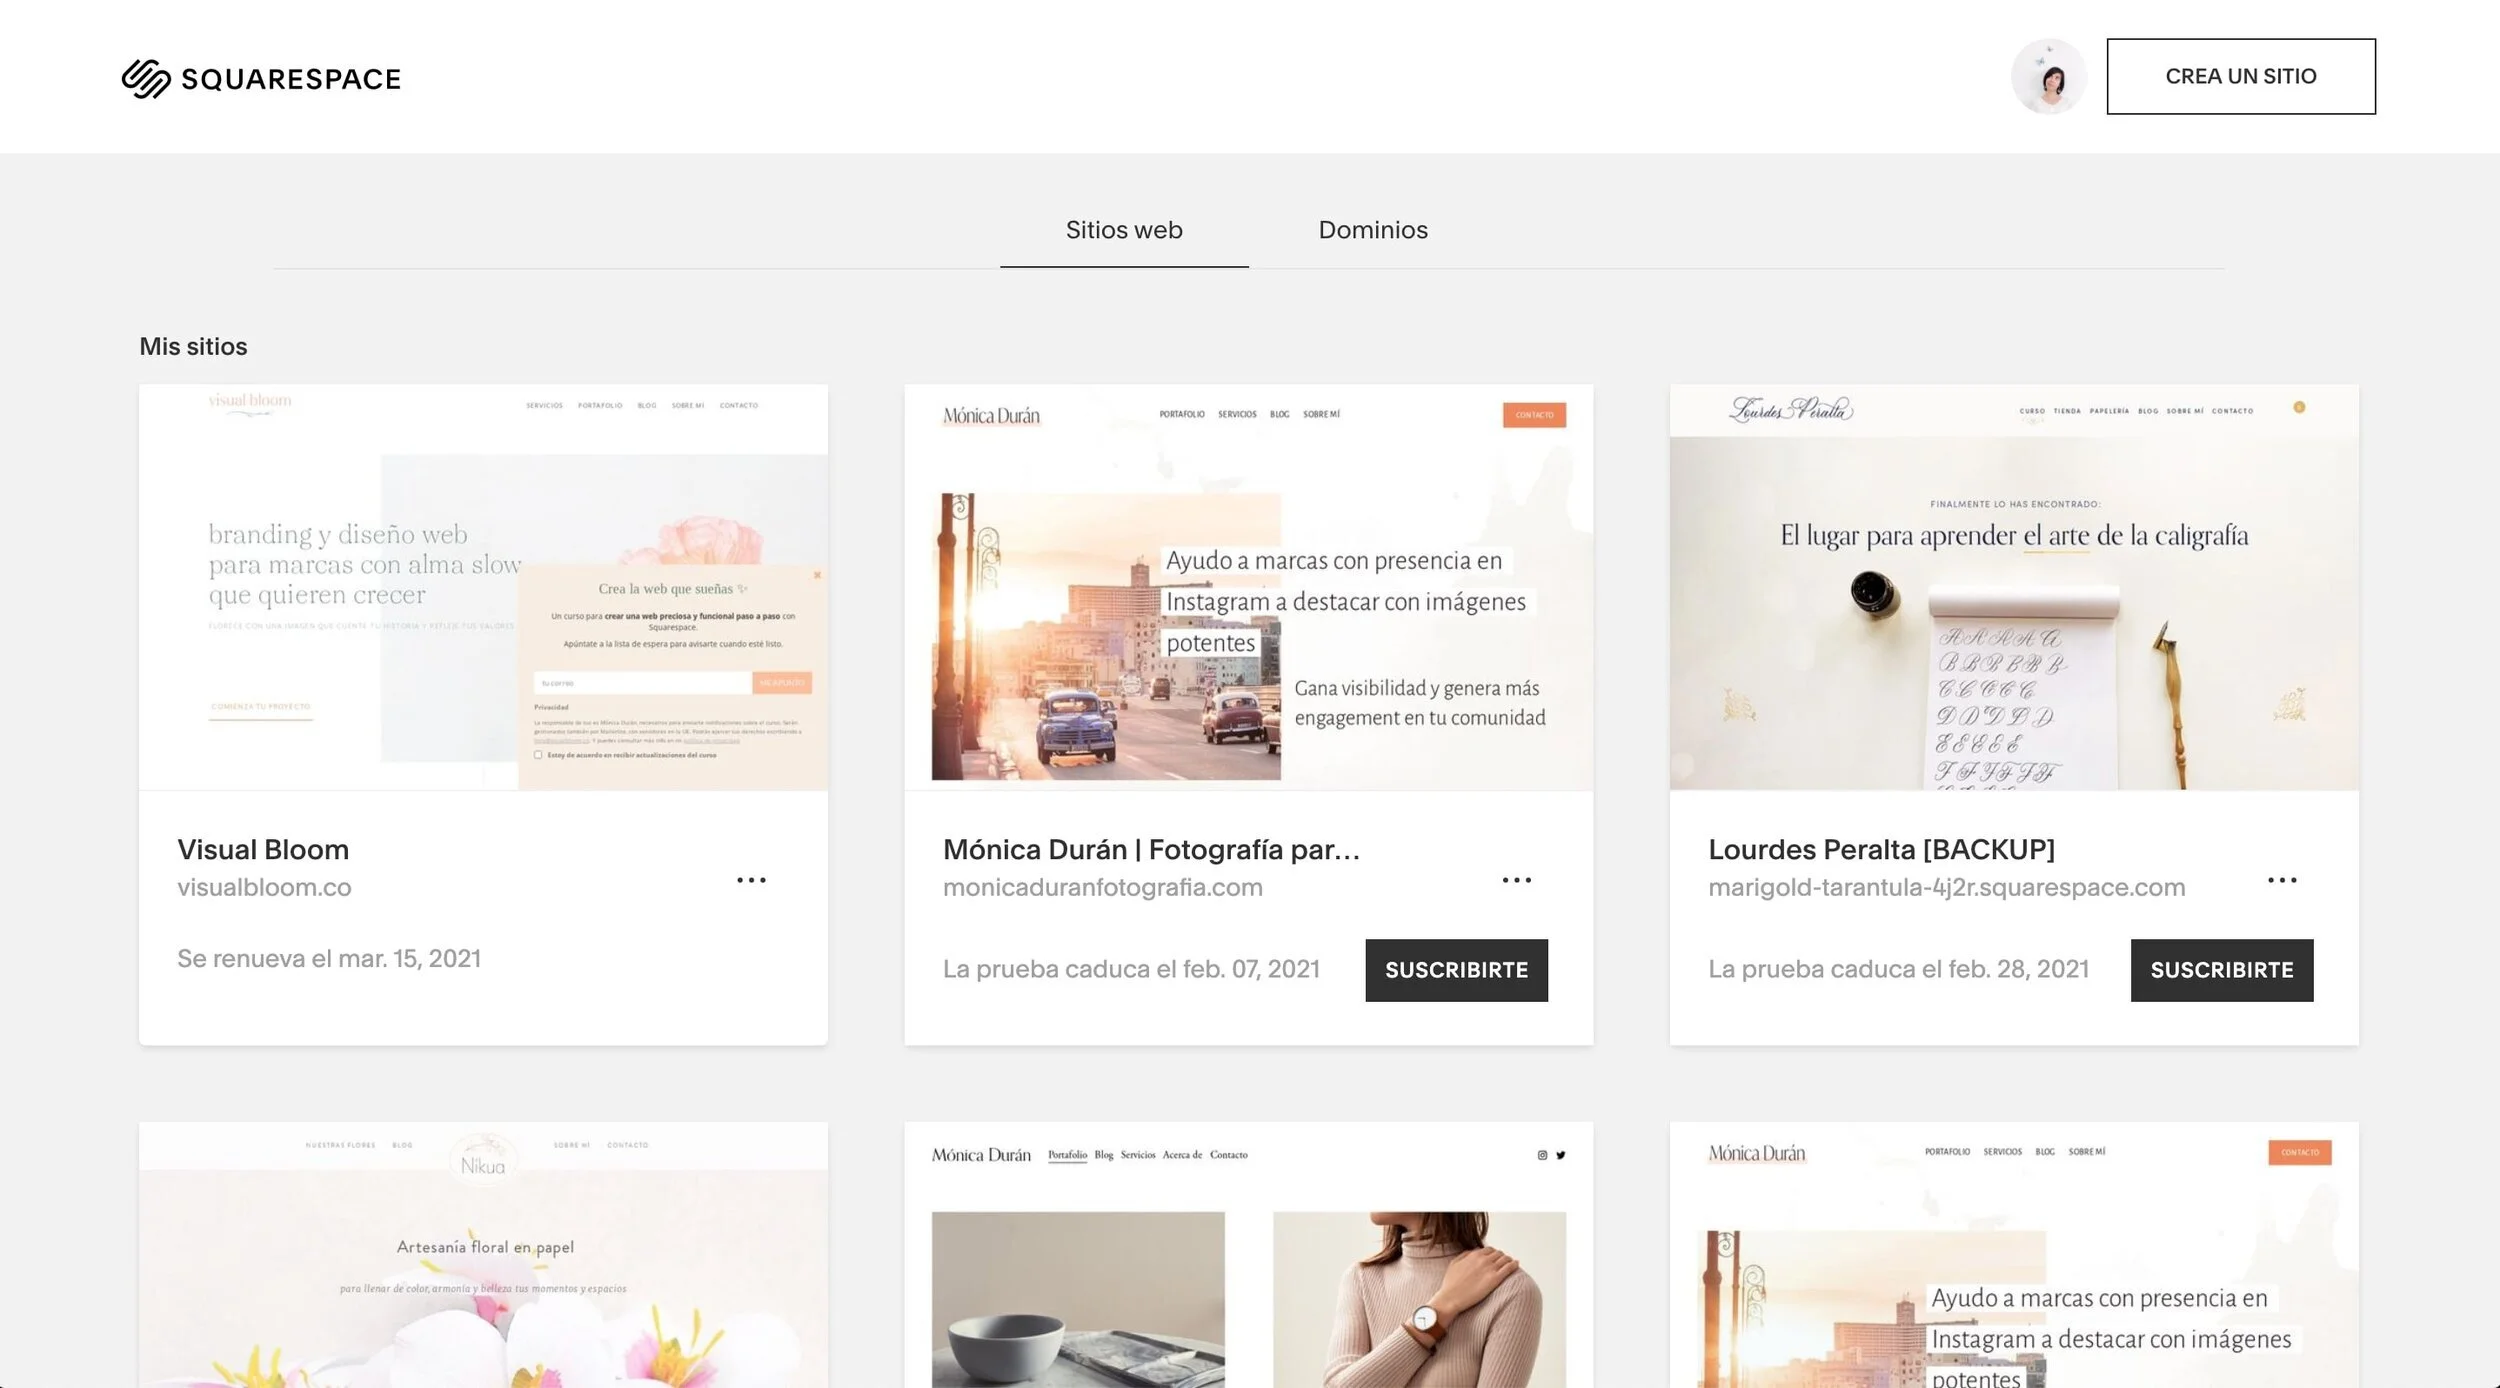
2. Click the three dots next to the site you want to duplicate.

3. At the bottom of the options, you'll find the option to duplicate the site.

When you select it, Squarespace will create a copy of your website in test mode.
Even if this new site expires, don't worry—you won't lose your data, and you can reactivate it if you ever need to. In any case, I recommend that you create a new copy of the original site every 3 or 4 months. It's a very simple process that only takes a couple of minutes, and you can set a recurring reminder in your calendar so you don't forget.
Take screenshots of the site
One of the things I like to do when I finish designing a website is to take screenshots of each page. That way, I have an exact copy of the content and design of each page, so that if there’s ever a problem with the site, I can review these screenshots to see how it was designed and what content was on each page and section.
To take screenshots of web pages, I use a tool called GoFullPage, which is an extension you can install in Google Chrome:
To use it, open the page you want to capture and click on the extension; it will then capture the entire page and open it in a new tab.
In this new tab with the captured page, you have the option to save it as a PDF or as a PNG image. It's very easy to use, and I highly recommend doing this once your site is ready.
Save the content of the site's pages
In general, I recommend creating a folder on your computer, in Google Drive, or in Dropbox specifically for your website backups. In it, you can save screenshots of the pages, and I also recommend creating a document (or separate documents for each page) where you save the text and images from each of your website’s main pages. For example, I have a folder for each page of the site where I include a document with the text and an additional folder with the images used on that page.
In addition to the main pages of your site, it’s also a good idea to back up all the blog posts you’ve published. If you use Google Drive to manage your site’s content creation, your content is already safe, because the very document in which you create your posts serves as a backup.
If you don't use this method, you have several options for backing up each post you publish:
Manually create a copy of every blog post you publish. In my case, I write my posts in a note-taking app, and once they’re ready, I copy them to a document that I save in the corresponding folder. I like to organize the images and text from my posts by year, so, for example, I have a folder called 2020, and within it I have a folder for each post I published on the blog in 2020. In each folder, I include the text and images used in the body of the post, as well as any additional graphics I create to promote the blog on Pinterest or Instagram.
Another option you can use if you have apps like Evernote or Notion is to install Chrome extensions that let you take screenshots of entire web pages with a single click, which are then automatically saved to your account.
Finally, there’s the most automated option: you can set up an automation using a tool like Zapier or Automate so that every time a new post is published on your blog, the content is saved to a Google Doc or Evernote, for example, without you having to do it manually. You can explore this, this, or this option with Zapier, or these with Automate.
In any of these cases, the first thing you'll need to know is the RSS feed URL, which is as follows:
http://www.tudominio.com/pageslug?format=rssWhere:
Replace "tudominio " with your website's domain
Replace "pageslug " with your blog's slug, which you can find in your blog's settings window:

To give you a specific example, in the case of this blog, the RSS feed URL is:
http://www.visualbloom.co/blog?format=rssExport your website's information and content
Export all profiles and products to a CSV file
In the “Profiles” section of your admin panel, you’ll find information about customer profiles (people who have made a purchase on your website) and subscribers (if you use Squarespace’s email marketing tool):
From here, you can export all the profiles stored on your site to a CSV file with just a couple of clicks.

In addition, in the “Commerce” section of your admin panel, you can:
Export your entire product inventory to another CSV file under Commerce > Inventory.
Export all order information under Commerce > Orders.
This way, you can back up your customers, orders, and products from your online store. In the case of products, you can import them into another site, which would save you the trouble of having to set them up (names, descriptions, prices, etc.) all over again.
Export the site's content
Squarespace offers the option to export your site's content as an XML file for import into a WordPress site. You can access this tool under Settings > Advanced > Export/Import, and if needed, import it into a WordPress site to access your content.
In my opinion, this is a somewhat convoluted way to access the site's content (especially considering that we have the option to duplicate sites), but it's another option. Here are more details on how it works and which elements of the website can be exported using this method.
Copy the codes you use on your site
If you've added CSS, HTML, or JavaScript code to your site, we strongly recommend that you back it up by copying it into a document. The places where you can add code within Squarespace are:
The "Advanced" tab in the properties of each page on the site.
Site-wide code injection under Settings > Advanced > Code Injection.
Injecting CSS code in Design > Custom CSS.
This way, all the code used on the website is saved and organized so that, if you ever need to rebuild your site, you can access it again.
Create a sitemap
One final recommendation is to create a sitemap—that is, an outline or visual map of your website’s pages. Especially if you have a website with many interconnected pages and need to recreate the entire original structure, you might forget some of them or not remember which pages linked to which. You can do this using a tool like MindMeister or simply on a piece of paper that you can later save or take a photo of.
How often should I back up the website?
My recommendation is that you perform a full backup of the site as soon as you’ve published it. Once you have this initial backup, how often you perform additional backups can vary depending on how often you publish or update the site’s content. For example:
If your site hasn't changed in the last three to six months, you don't need to make a new backup of all the content because the one you made initially will still work.
On the other hand, if you’ve published a lot of new content in the last month or over the past three months, then it would be advisable to perform a full site backup every three months or even every month.
On the other hand, if you have a busy online store with a lot of traffic and sales, it’s a good idea to export your store’s products and customer data every month—or even every week (if you use one of Squarespace’s Commerce plans, you can even automate this type of backup).
You should start assessing the frequency and extent of the support based on your specific situation.
In general, a backup procedure would be:
Duplicate the site, capture pages, and copy the implemented code after it has been published.
Back up your site and capture pages on a regular basis, at a frequency that best suits your needs.
Export customer, subscriber, inventory, and order data on a regular basis, as needed and at the frequency that best suits your needs.
Create a manual or automated backup system for blog posts that runs every time a new post is published.
I know all this might sound like a lot of work, but the truth is that if we incorporate it into our workflow using automations and recurring reminders, it takes no more than 5–10 minutes each time, and we ensure that all our content is backed up.


![How to Sell Online Courses with Squarespace [Updated for 2024]](https://images.squarespace-cdn.com/content/v1/6788d438405dc03eabea6c99/1737020477911-65DRZUM6E66MDXLHVRT9/cursos-Squarespace.jpg)

