How to Create a Website on Squarespace in 7 Steps

For quite some time now , if you run a business, having an online presence is no longer optional:
A website is your project's gateway to the world,
is the way for your customers to find you, regardless of their location,
to showcase what you offer and display your work,
and to build a relationship with your audience and let them contact you.
Today more than ever, all of those reasons are even more relevant.
I’ve specialized in web design and development on Squarespace since 2017, and I believe Squarespace is one of the best platforms you can find for creating your online presence: it’s designed specifically for the DIY crowd, is extremely user-friendly, very easy to manage and maintain, and requires virtually no upkeep.
Besides, if you’re a minimalist at heart or value how you spend your time and mental energy, you’ll agree with me.
Table of Contents
1. Choose a template for your website.
To create a website on Squarespace, the first thing you need to do is choose a template that will serve as the starting point for your design.
To go to the templates page, click the " Get Started " button on the Squarespace homepage.


Once you're on the templates page, choose the one that best matches the design you want for your website. You can also use the options on the left to filter templates with designs created for each category. And don't worry about the features: all templates offer the same configuration options, and everything you see is fully customizable.
Related: How to Choose a Template for Your Website on Squarespace
2. Add your content
Once you've chosen your template and created your Squarespace account, you'll be taken to your website's admin area. You'll see a dashboard with several sections, and under " Pages," you can create and manage all the pages on your site and add your content.
You can use the pages and layouts that come pre-built with your template and simply replace the content with your own, or you can create your own pages and layouts.
Squarespace uses content blocks to add elements to pages, and there are many types of content to choose from, including:
Texts
Images and photo galleries
Combinations of images and text
Videos
Instagram Gallery
Buttons
Forms
Calendars
These are just a few examples, but there are many more types of content you can add to your pages.
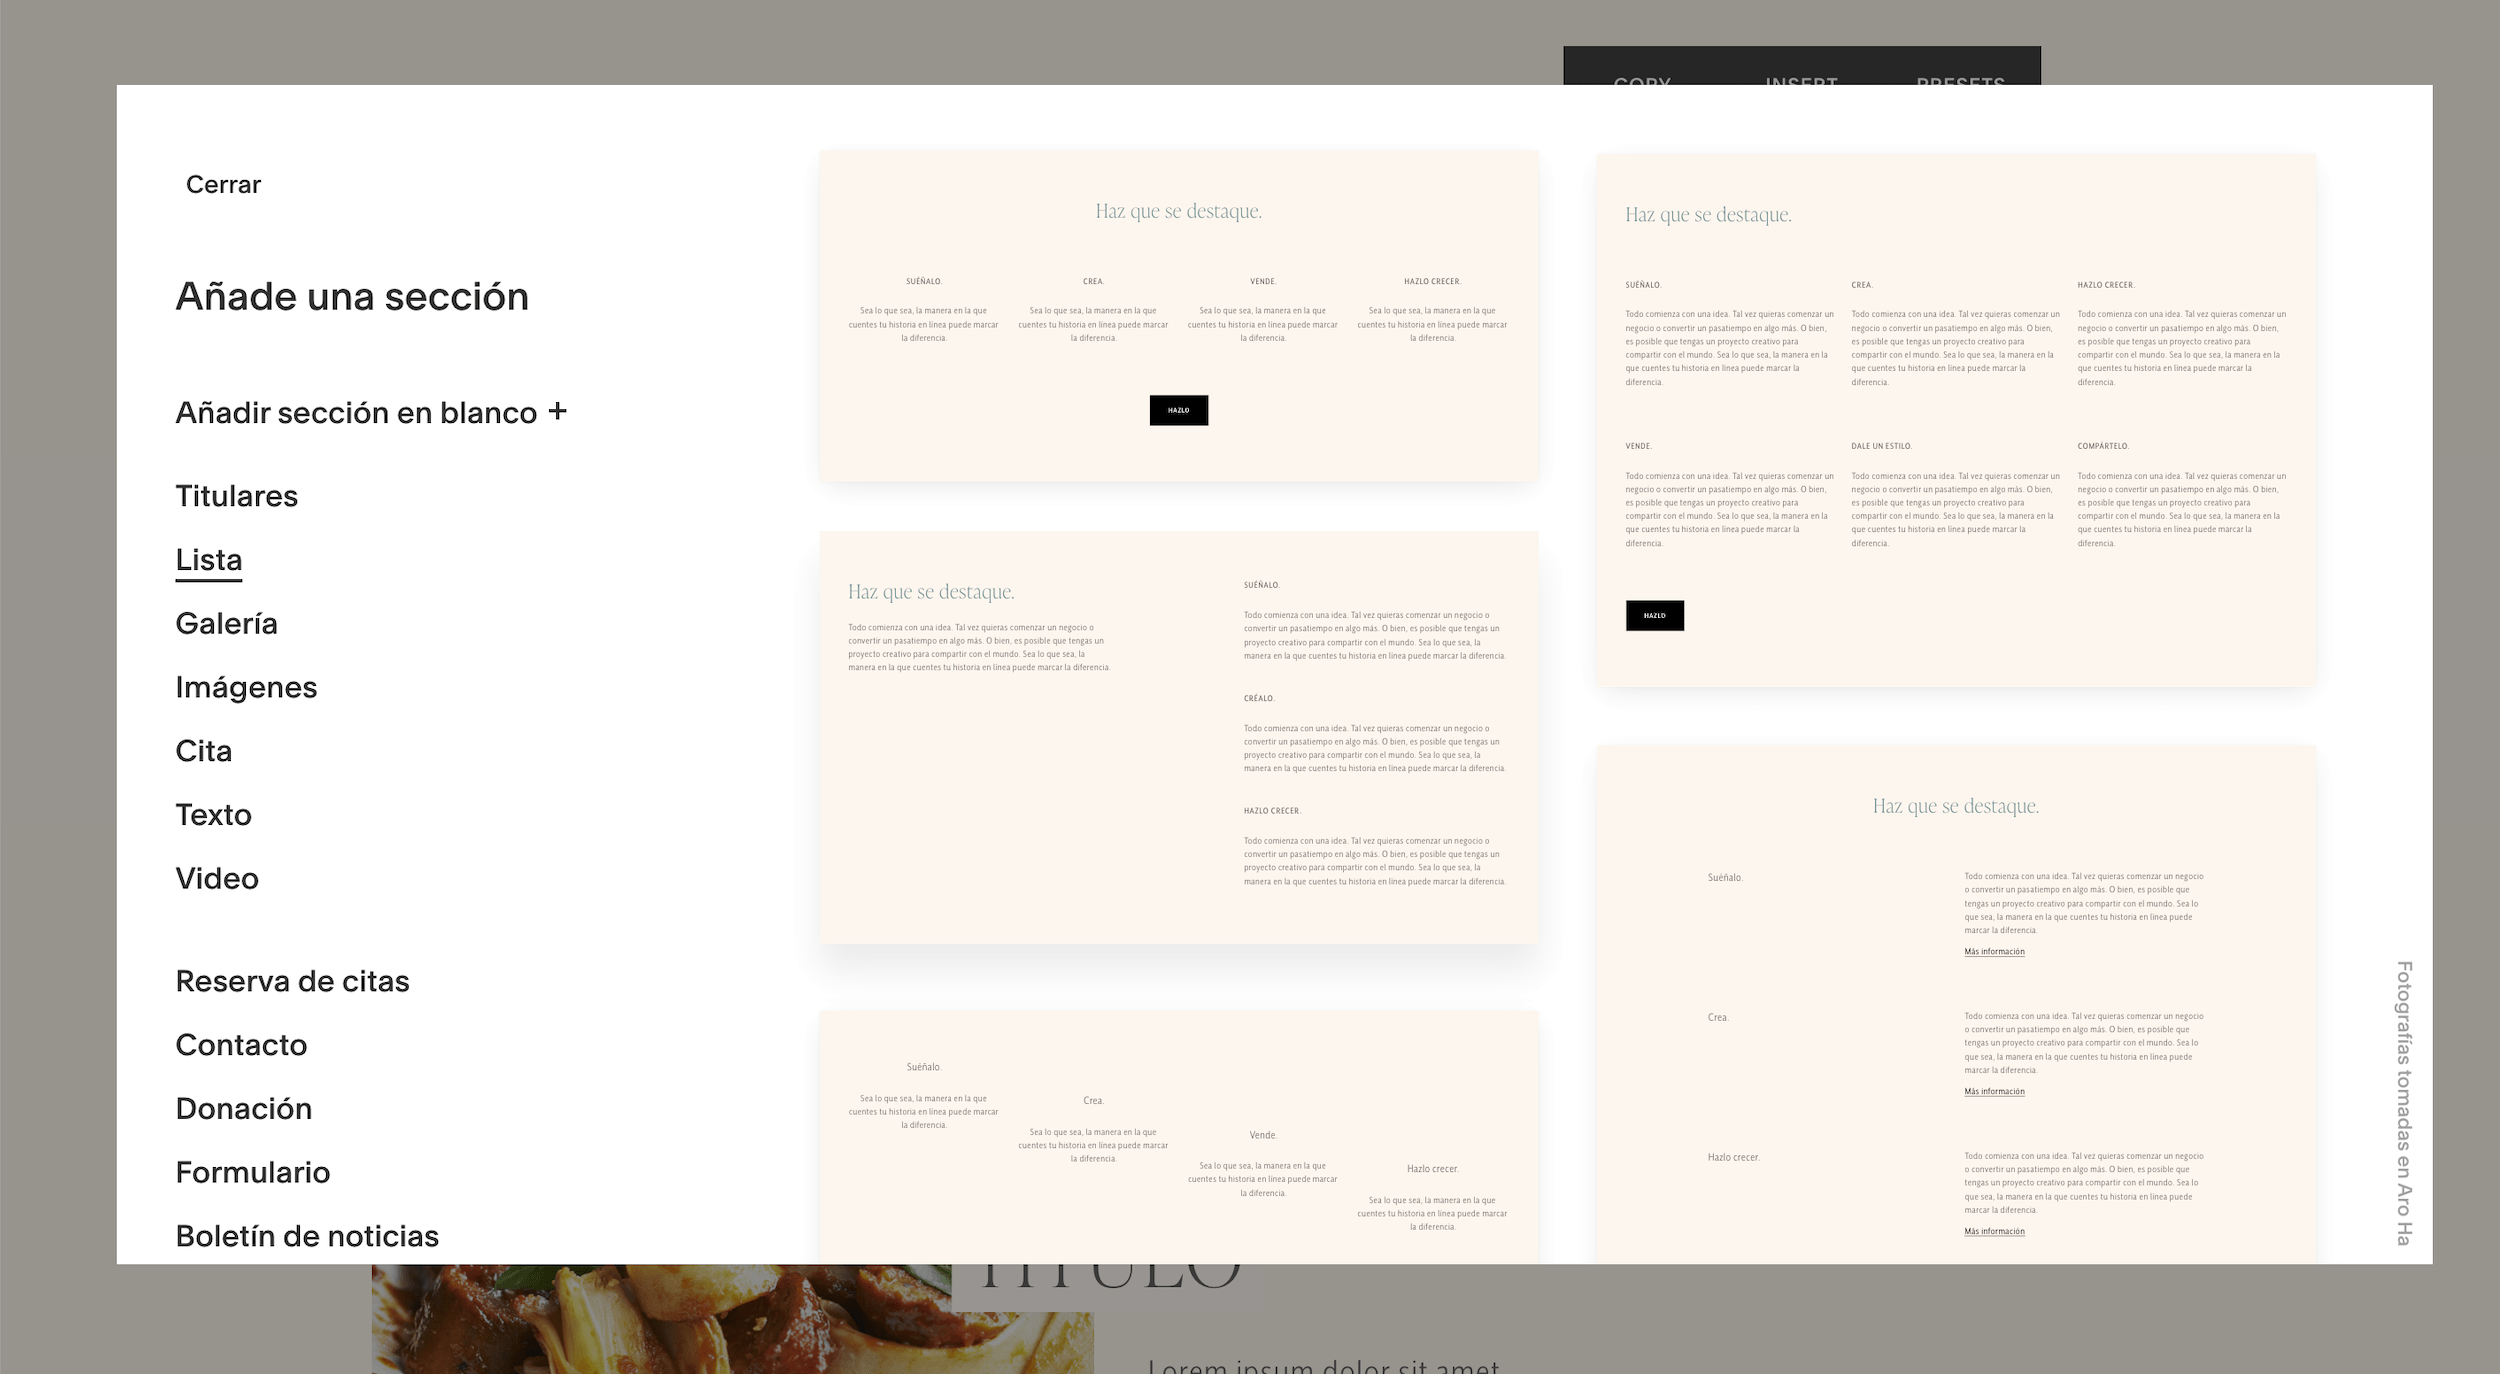
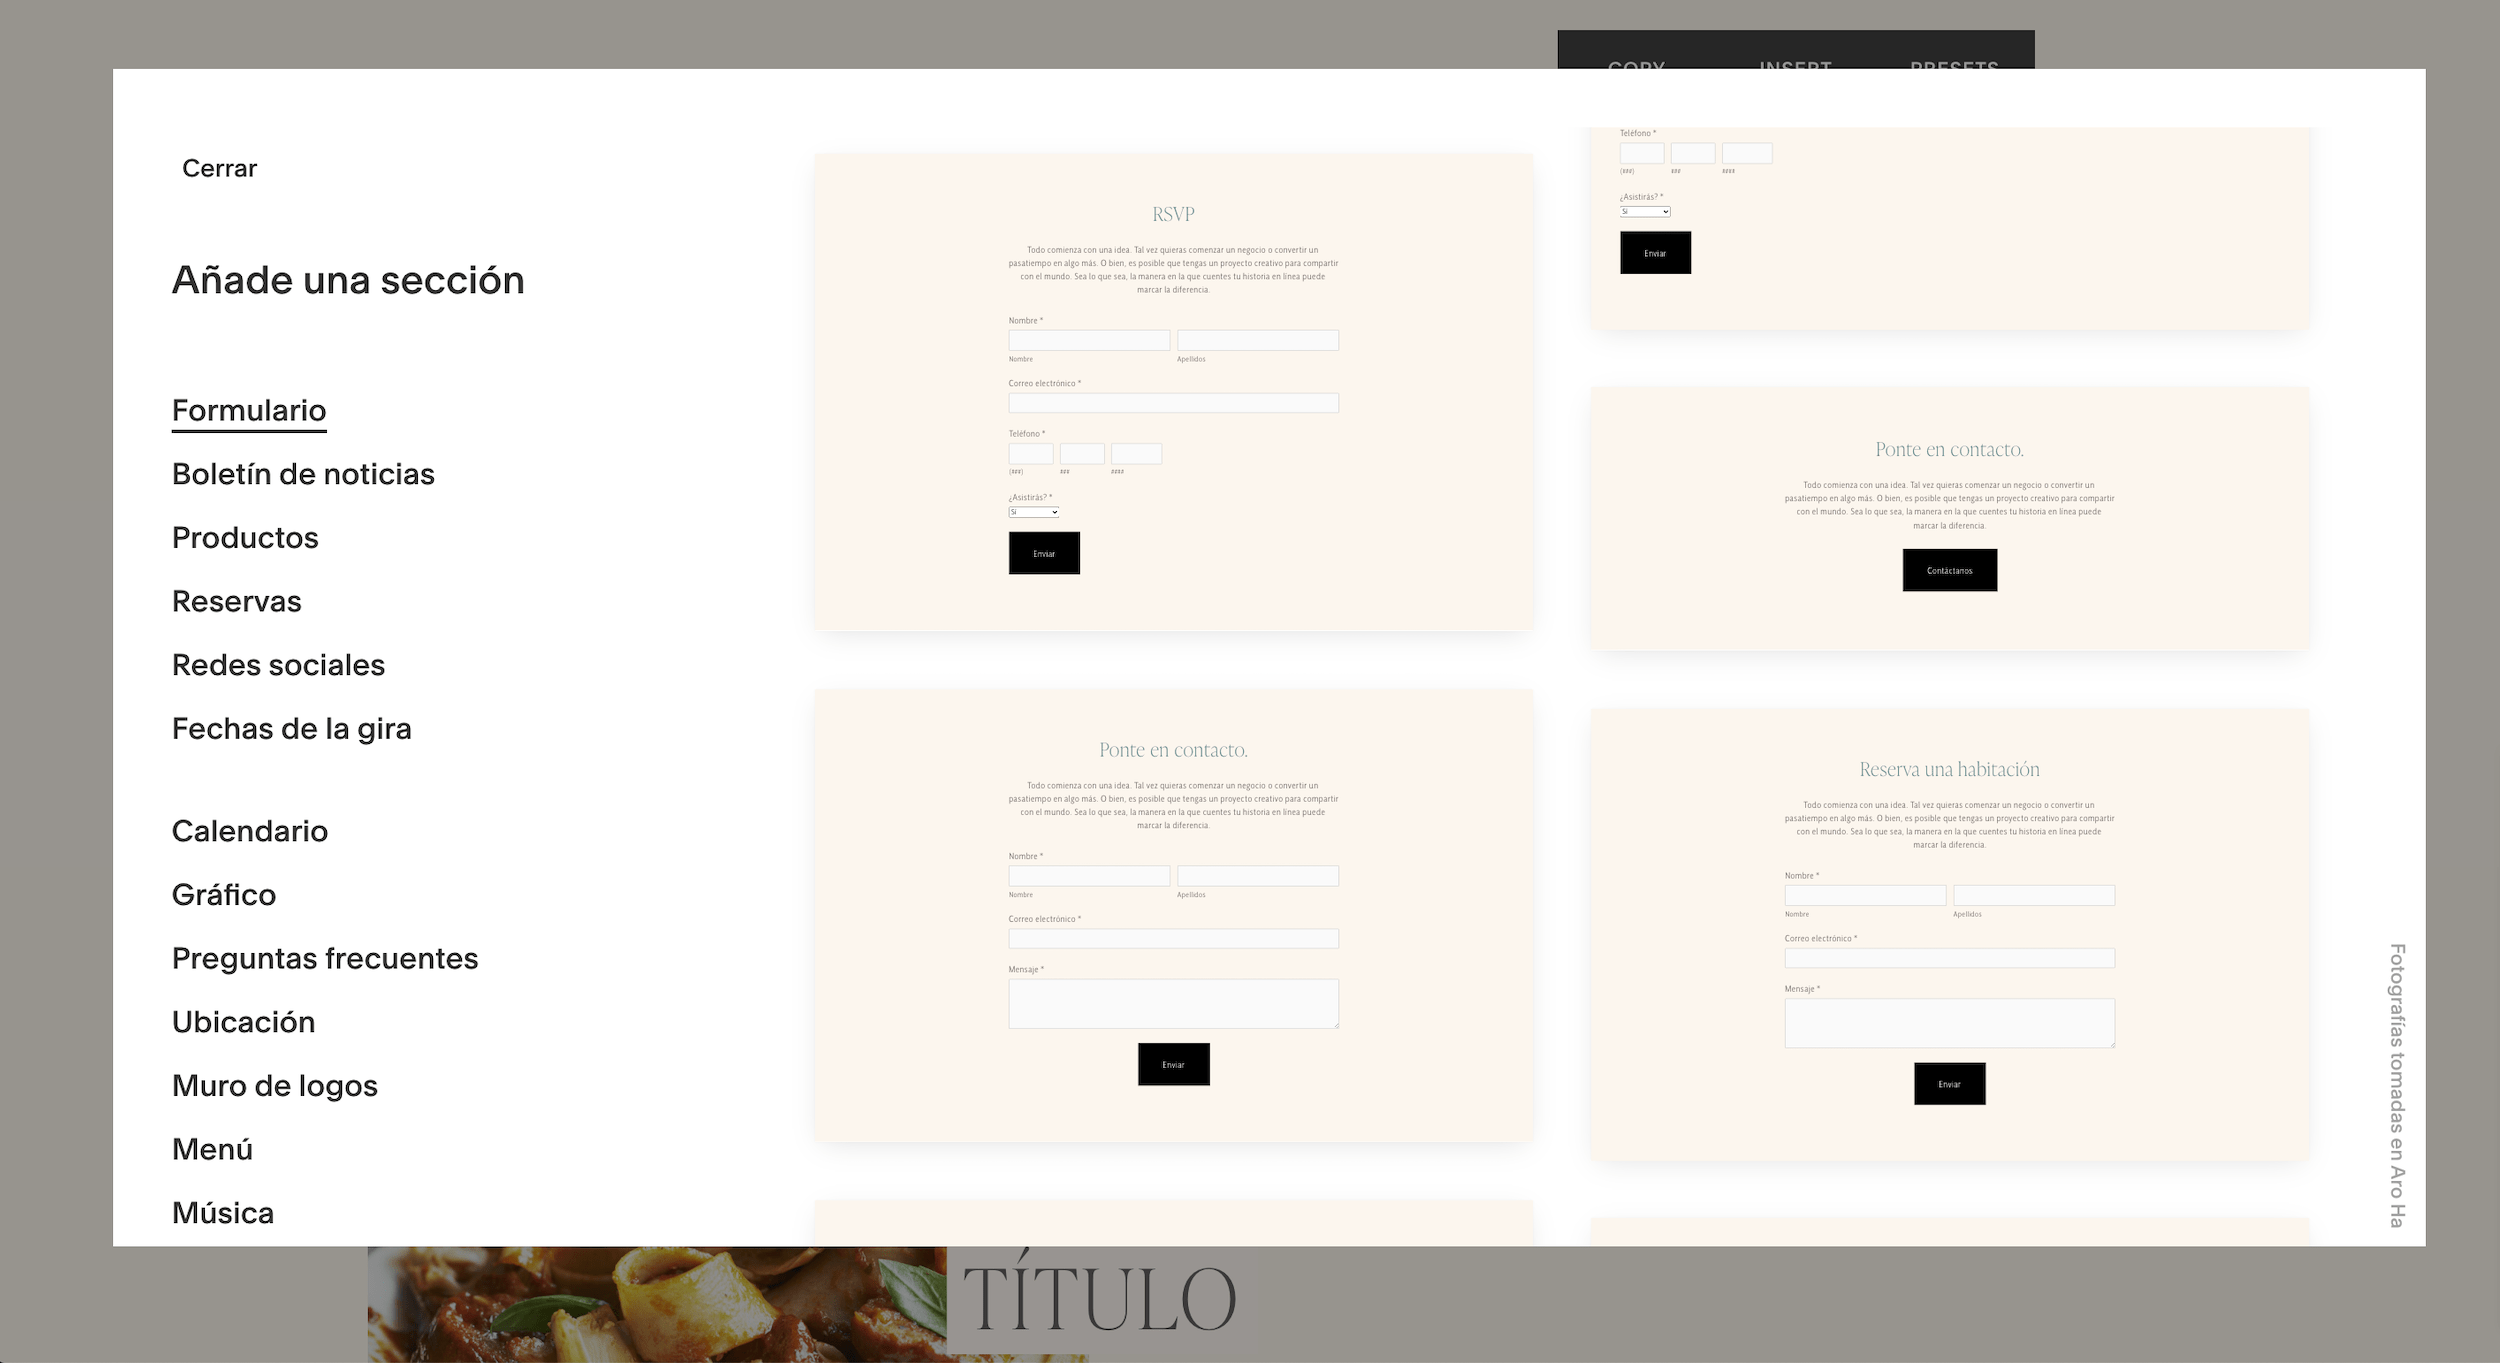
Plus, you can add sections to each page and customize their colors, backgrounds, animations, alignment, and more. Squarespace really offers a wide range of design possibilities, and it’s built so that the elements you add follow certain design principles, ensuring your website always looks great.
On top of that, Squarespace also makes your life a lot easier with its pre-designed pages and sections that are ready to use with just one click.


Create a blog with your first posts
Creating a blog isn't essential for launching your website, but it's a very powerful marketing tool that allows your audience to find you and connect with you through the content you share. Plus, it greatly improves a website's SEO. That's why I always recommend including a blog with relevant posts on any website.

If the template you chose already includes a default blog, you can use it to replace the sample content with your own. And if it doesn't include a blog, creating one is very easy:
Click the “+” icon.
Select Blog.
Choose one of the ready-to-use designs.
And that's it—you've created your blog.
Once you've created it, you'll see that Squarespace has already included some posts; all you have to do is replace the sample content with your own. Remember to add the following to each post:
Categories
Thumbnail image
A brief description
And a custom URL
You can also enable the option to automatically share it on your social media when you post it.
Generally speaking, my advice is always this: if you’re going to start a blog, make sure your website isn’t empty or has only one post when you launch it—have at least three posts published from the very beginning.
3. Customize the template design


Now that you've created your website pages and blog and added all your content, it's time to customize your website's design.
Basically, there are two places where you can customize the design of your pages:
1. Within the pages, in edit mode.
Here you can control the design settings for each section in the section properties, on the Design tab.
2. And in your site's admin panel, under the Design section.
From here, you can make global site settings, such as configuring fonts, colors, spacing, animations, and more. Squarespace has significantly improved this section compared to what was available in the previous version, and you can make adjustments in a very visual way.
Under "Fonts and Colors," you'll see that you have:
The fonts section, where you can choose from ready-to-use font combinations or customize them using the Google and Adobe font catalogs, which are included in the platform for all sites.
In the Colors section, you'll find a color palette that determines the site's global colors—a great way to ensure visual consistency across the entire website. You can choose one of the pre-made palettes offered by Squarespace, create one from an image, select a single color and let Squarespace generate the rest of the palette, or customize each color individually.
If you want to take it a step further, you can access "Section Themes " to more precisely control the color schemes for different sections (this is a bit more advanced, but we'll cover it in the course).


4. Configure your privacy settings
A very important step in creating any website—and one that is often overlooked—is configuring the site’s privacy settings. On Squarespace, there are several things you should do to ensure your visitors’ privacy:
Enable SSL (it is usually enabled by default, but it's a good idea to check).
Blocking cookies.
Enable the cookie banner.
You can find these settings under Settings > Cookies and Visitor Data and under Settings > Advanced > SSL. You’ll also need to configure any forms you include on your website separately; here are a couple of articles where I explain this in more detail:
GDPR: How to Add a Checkbox and a Link to the Privacy Policy in Squarespace Forms
GDPR and Squarespace: How to Ensure Your Site Complies with the Law
I also recommend Caribay Camacho's website if you'd like to learn more about online legal issues.
5. Choose or connect your website's domain
The next step is to choose a domain name for your website. This isn't strictly necessary, since your Squarespace plan includes a domain like yourwebsite.squarespace.com, but if you want something a little more professional and personalized, it's highly recommended that you get your own domain.
You can purchase the domain directly through Squarespace or through a third party such as Google or GoDaddy.
If you're going to sign up with Squarespace
Just click the "Register a Domain" button and search for the domain you want.
If you've already registered a domain on your own
You'll need to click "Use a custom domain" to connect it. If your domain is hosted by one of the providers listed here by Squarespace (which are the most popular ones), the connection process is automatic.
If you use a domain provider other than those listed by Squarespace, you'll need to do a little manual work (or hire someone to connect your domain), and here's a detailed guide from Squarespace on the topic.
6. Choose a subscription plan
The final step is to choose the Squarespace subscription plan that best suits your needs. Although Squarespace is a paid platform, I believe it’s worth every penny: it’s very secure, you don’t have to worry about hosting capacity, plugins, updates, or incompatibilities, it’s very easy to manage, and, in short, whatever you invest in it, you’ll earn back in the time and effort you’ll save by not having to maintain the website yourself—plus the peace of mind that comes with it.
You can view all of them at this link, but generally speaking, I always recommend starting with the Personal plan and upgrading to Business if you need to. I also recommend signing up for the annual plan whenever possible, as it works out cheaper that way.
To sign up for your plan, click the blue button at the bottom of the page that says “Publish your site,” and then click “Subscribe to publish.”
You can also go to Settings > Account & Billing > Billing and click “Update,” which will open a window where you can choose your subscription plan.

7. Publish your website
Once you've connected your domain and signed up for a plan, it's time to make your site public. Just go to Settings > Site Availability and select the "Public" option.
And that's it! Your site is now live. From now on, anyone who visits your URL will be able to see it, and you can start attracting visitors and potential customers.
8. Additional Settings
Everything I've just shown you is what I consider the basics for a website, but with Squarespace, you can definitely add some extras to get even more out of your site, depending on your needs:
Optimize your website's marketing
In the Marketing panel, you'll find a range of options that will help you boost visitor engagement with your content, attract subscribers, promote ads, and more.
If you're just starting out, I recommend focusing on optimizing your site's SEO and enabling the Pinterest share button, as these are the two elements that will help you rank higher in search engines and attract visitors to your website.
Related:
How to Optimize Squarespace for SEO (and Make Google Love You)
Add and set up a portfolio
Did you know that creating a portfolio on Squarespace is really easy? Just follow the same steps you would use to create a blog, but instead of selecting "Blog," select "Portfolio."
If a portfolio is one of the key elements of your website, you can choose a template designed specifically for portfolios right from the start. You also have several design options for creating a highly attractive portfolio, which I explain in detail in my course.
Related: 5 Tips for Creating an Effective Portfolio for Your Website
Sell physical or digital products through an online store
With Squarespace, you can add an online store to your website using e-commerce management tools, without having to install any additional software. This feature is available on all plans except the Personal plan, but it’s well worth it if you’re interested in selling physical or digital products on your website.
There are many more things you can do with your Squarespace website, such as selling online courses or creating bilingual or multilingual sites—you can explore these options on the blog.
As you can see, creating a website on Squarespace isn't too complicated, and if you already have your site's content ready, with the help of the platform's excellent DIY design tools, you can create and launch your website in just a weekend. We cover all of this in detail in my course, so check it out by clicking the button below.


![How to Sell Online Courses with Squarespace [Updated for 2024]](https://images.squarespace-cdn.com/content/v1/6788d438405dc03eabea6c99/1737020477911-65DRZUM6E66MDXLHVRT9/cursos-Squarespace.jpg)


